Article by Asia Chapdelaine
For spring it is important to understand the types of plants you’ll use. Boxwood, Evergreen, Cedar and Juniper will define the framework of your green area. If we keep these green friendlies in mind through planning, preparation and planting you’ll have the company of green all year round. A Perennial, this one lasts for more than two years. A Biennial, which blooms in its second year and than dies, or an Annual a plant that usually germinates flowers and dies within a year or season.
Proper greening and flourish involves the different strengths of sunlight or shade for placement of Perennials, Biennials and Annuals. Know the lifeline of the plant, do some research as it is great to see the rise of different species throughout the seasons. I encourage greening to offset carbon emissions. Trees absorb the carbon of greenhouse gases emitted by our cars. All living plant matter absorbs CO2. Greenhouse gases are the main reason to start planting in our gardens, porches, decks and eventually our rooftops.
In the Toronto area, sky rise rooftops are on their way to being green savvy. A green roof system is a roof of a building that is covered with growing medium and is usually planted over a waterproofing membrane. They include a root barrier, drainage and irrigation systems. The Garden City, has not optioned this by law just yet. I am an eager Canadian beaver searching for signatures to get this bylaw approved within the Niagara region . I still need quite a few signatures. I am well on my way to getting this bylaw passed.
Greening involves some pre-planning. A few tips of how to green decks and porches will get you started using a well designed floor plan, a 3D Mood Board, for scale and proportion, using the right accessories, identifying fillers, lighting and of course greening.
DESIGN YOUR FLOOR PLAN
Start with removing your items from the deck or porch. On an 8×10 piece of paper draw your perimeter lines and measure the total width, length and height of your railings, document the vertical space as it is important when using a trellis. If you’re working with a small or large area measure the floor space. This will give you an idea of where to place your objects & furniture on paper prior to placement. A few of my favorites climbers are Roses, Vinca, Thyme, Speedwell, Cerastium, Sandwort, Russian Sage or Clematis; they’re wonders for screening an area for privacy or blocking gusty winds. On a trellis they add colour and pizzaz to your deck or porch. Some of us have used long maiden grasses for privacy. There are so many ways to climb so aim high! Identify your shade and sun location as this will influence your decision when purchasing the type of plants or shrubs.
NOTE: This floor plan will act as your visual guide for your measurements, placement of vessels, as well as your furniture, trellis, garden sculptures and greenery.
SCALE AND PROPORTION
Scale is largely based on perception and weather or not things could be improved. When planting, this is how they are attached to each other. Proportion is the relationship of one object to another. Or from one surface to another. You’ll need to plan a front view of a 3 dimensional diagram to set a presence of flow and design. After all this is your outdoor abode. It is an additional room inside nature. There are many landscape design companies that provide 2D and 3D diagrams for planning.
The how to do it yourself this will take some time, be patient.
Option one: Take a photo of the complete shot of your house and develop the photo.
Take it to a printer and have it blown up to a 24 X 36 sheet of paper. Sit at a table and heavily trace the line of your deck line, and draw a heavy vertical line where your deck or porch railing ends. Draw two horizontal lines, of equal distance apart under the deck line. Draw a diagonal line from the lowest line (corner to corner) to highest point ending atop of the vertical line.
Option two: Draw the full scale of your house. Stand ten feet from your porch or deck.
Outline your house on a 24X36 sheet of construction board. Use a straight edge, or ruler. Draw a heavy horizontal line along the floor of your deck, the same method again, a heavy vertical line where your deck or porch railing ends. Beneath the deck line draw two equal horizontal lines, the same width as your deck. You should see three equal lines on top of one another. Draw a diagonal line (corner to corner) to meet the top of the vertical line.
The triangle you now see will be used as a frame or guide. Stay within the lines for placement of plants, flowers, trees, and shrub heights or when adding accessories, rocks trellis or lighting.
PLANTING IN 3D
You’ll need to purchase some magazines that contain accessories for the garden, planters, flowers, plants, shrubs and trees and vessels. Cut out lots of pictures, at least 100 pictures from all travel, home, and gardening magazines.
Sit at your table and organize stacks of all the collective photos in a plants pile, shrubs pile, etc. Trim them to their actual size. Keep them organized. The idea is to see proportion, using scale. You’ll be placing them on your board within your triangle outline on your diagram.
When placing photos on your board, build up your cut-outs, from inward out. Everything you want on your deck or porch goes on the top line first ie: planters, plants and flowers inside your pots your trellis, sculptures etc. Don’t worry about covering the railing. Lay your photos within your triangle.
You can break these rules later! Once you completely understand proportion. You’ll be moving the clipped out photos around on the paper quite a bit. Stick with it!
The second line on your diagram – Use higher plants and show stoppers (with your layering on paper don’t worry if they overlap your deck line) the point is greening your decks and porches. Consider maybe a few different butterfly bushes, a bird bath or feeders to watch nature close by. Clear the area and order up some triple mix to create some higher levels above your grass line, for the middle line is your second dimension of greenery. You’ll need your pea gravel for presentation (see: Using a Filler), or to use inside your low to high vessels.
Ground creepers like Hens and Chicks will grow healthy around rockery. Or pop it up in a straight line with crowd pleasers like the Iris, Holly Hock or Foxglove. They display beautifully against your decks and porches. Use your picture cut outs.
The third line – is closest to the grass line you could cut the grass out in a curvy shape, use a railway tile or simply appealing low crawling ground covers like Lambs Ears, day lily or ivy. Larger rocks maybe a tree (refer to the triangle on your diagram) I prefer to add Maltese Cross,(Lychinis), Lupine, Lily of the Valley, to keep the green growing lots of spreaders. Always add some hearty green shrubbery like Japanese Juniper, Evergreen, Mung, mini pine or Blue Spruce. When the season changes again for the cold and most of the colour is gone you’ll appreciate seeing green.
You should do this for your floor plan as well! Seeing it on paper always helps you when designing your garden. Bring your board with you when you go to the garden centres or nurseries they should know what kind of plant, shrub or tree is if you don’t.
LAYERING, SCULPTURES, ACCESSORIES AND VESSELS
Vessels and sculptures vary in all shapes, sizes and materials. They add interest. They contain a projection of what you’d like to see everyday close by. You must create different height effects on your deck or porches just like you would inside your home. It is a decor strategy and it sets different elevation levels for your flowers that need sun or shade. This effect will also warm your environment when sitting during breezy days or nights. I have rustic stone tall St. Francis close to the steps of my deck He is known as the patron Saint of animals and the environment. You’ll want to select accessories that represent you. Is it a jade Buddha? Some glass butterflies? Metal crowns? An Eagle?
If my sister had a garden I know she’d put a lot of frogs and reptiles of different sizes and materials. Know what you’re looking for through research. Try to find recycled materials. They will last for many years to come if you purchase the right ones. You’ll find the ones you just can’t live outside without! The great piece de resistance of the vessel is that if you tire of the plants within it, you could transfer your perennials from vessel to garden with the right organic matter, transplanter, debugger, fertilizer, water and soil mix. For organics to work you need to use them together.
Materials best suited for Canada are the improved recycled resins, usually imported, formed to withstand the coldest and hottest climates. If your looking for an urban influence Barracuda in Toronto at 527 Parliament Street will ship to your door. They have a niche within their competitive market that offers multiple shapes, heights, vibrant colours and neutrals for all design projects.
Thankfully they offer lightweight material for those of us who can’t lift like we used to. They provide products of unlimited scale and proportion. They accommodate to the public, designers and the commercial user as well, they are a must see. You should get an idea of the shapes you’d like that will suit your decks and porches.
Sheraton Nurseries in Toronto on 2827 Yonge Street allowed me to show you a sneak peak of what’s available for options. Their products, plants and staff have great flare. An interesting popular demand product they carry is called “ The Everlasting Shrub”, a material that lasts through all seasons for greening decks and porches, walkways, and interiors.
Book an appointment for extra attention because they are overwhelming with creativity, knowledge and ideas that you just won’t want to miss. The options of sizes, shapes and colours available will suit almost any size issue you have with filling your vessels. Seeing the green all year round with the everlasting shrub from Sheraton Nurseries may be your solution.
NOTE: Go to google.com under images, type in outdoor resin vessels, concrete planters or outdoor glass planters – When selecting vessels of different shapes remember to use your measurements and floor plan.
Try to select one lighter or darker colour that mirrors the exterior of your home. For your
accessories, sculptures, beach rocks, river rock and it will look like you hired a designer.
Don’t be an over-gardener, remember to keep it simple!
USING A FILLER
Beach stones, polished river rock, sea shells, polished glass, cedar wood chips, pea gravel, playground mix and mulch, are just a few to mention as options for covering soil. And great for filling vessels. There are endless options for colours and materials. They project great texture and act as accents for your plants and home. The larger rocks and stones are a great way to hold down the lightweight resin vessels. I have them in all my planters outside and throughout the garden in every size. Spreaders like Spanish moss, ivy or sedum are great as filler too especially in a vessel. They’ll grow nice and hearty for when they grow out of there container. Split them up in the warmer months when they get over aggressive and add them to the garden. They are easier to control and maintain when contained.
BRING IN THE CHANGE OF SEASONS
Always plant to see the seasons changing, be sure that something is always blooming, I have Clematis that blooms late fall into late January, it’s really an amazing system once you see your planting unfold with time. Hire a decking company that can work within the structure of your deck for those of you that want to add a green feature to their design: a circular cut-out placed within the deck to enhance a friendly pointed upright Juniper or your favorite flowers to bring attention to your focal point when lounging. I’ve also seen grapefruit sized holes in the decks containing a gardeners stake or Bamboo stake as a trellis mock for climbing greenery. I’ve seen 6 or 7 trees planted within extremely large decks. With the right lighting, it is such a show stopper! Use your floor plan and watch your sun spots. You could position these circular effects to retrieve shaded areas for those hot days too. Usually the effect is worth the cost of a professional about $400.00 to start for larger circular cut-outs.
NOTE: you should not attempt this one yourself! Your floor plan is a great tool to use prior to this project. Remember with this technique it’s the same rule when planting in the ground. The circle will be double the size of your root. This rule pending on the maximum growth height when matured. The Deck Store has a flagship location just off the Q.E.W at 454 South Service road Oakville, Ontario.
They specialize and offer a complete package for your one stop shopping experience. Catering to upscale decking needs, from custom design 3D illustrations to offering products such as railings and screens, deck accessories, deck mood lighting, hardware, stains and finishes and so much more.
Book an appointment or visit their website, deckstore.ca. It is designed for you to get great ideas.
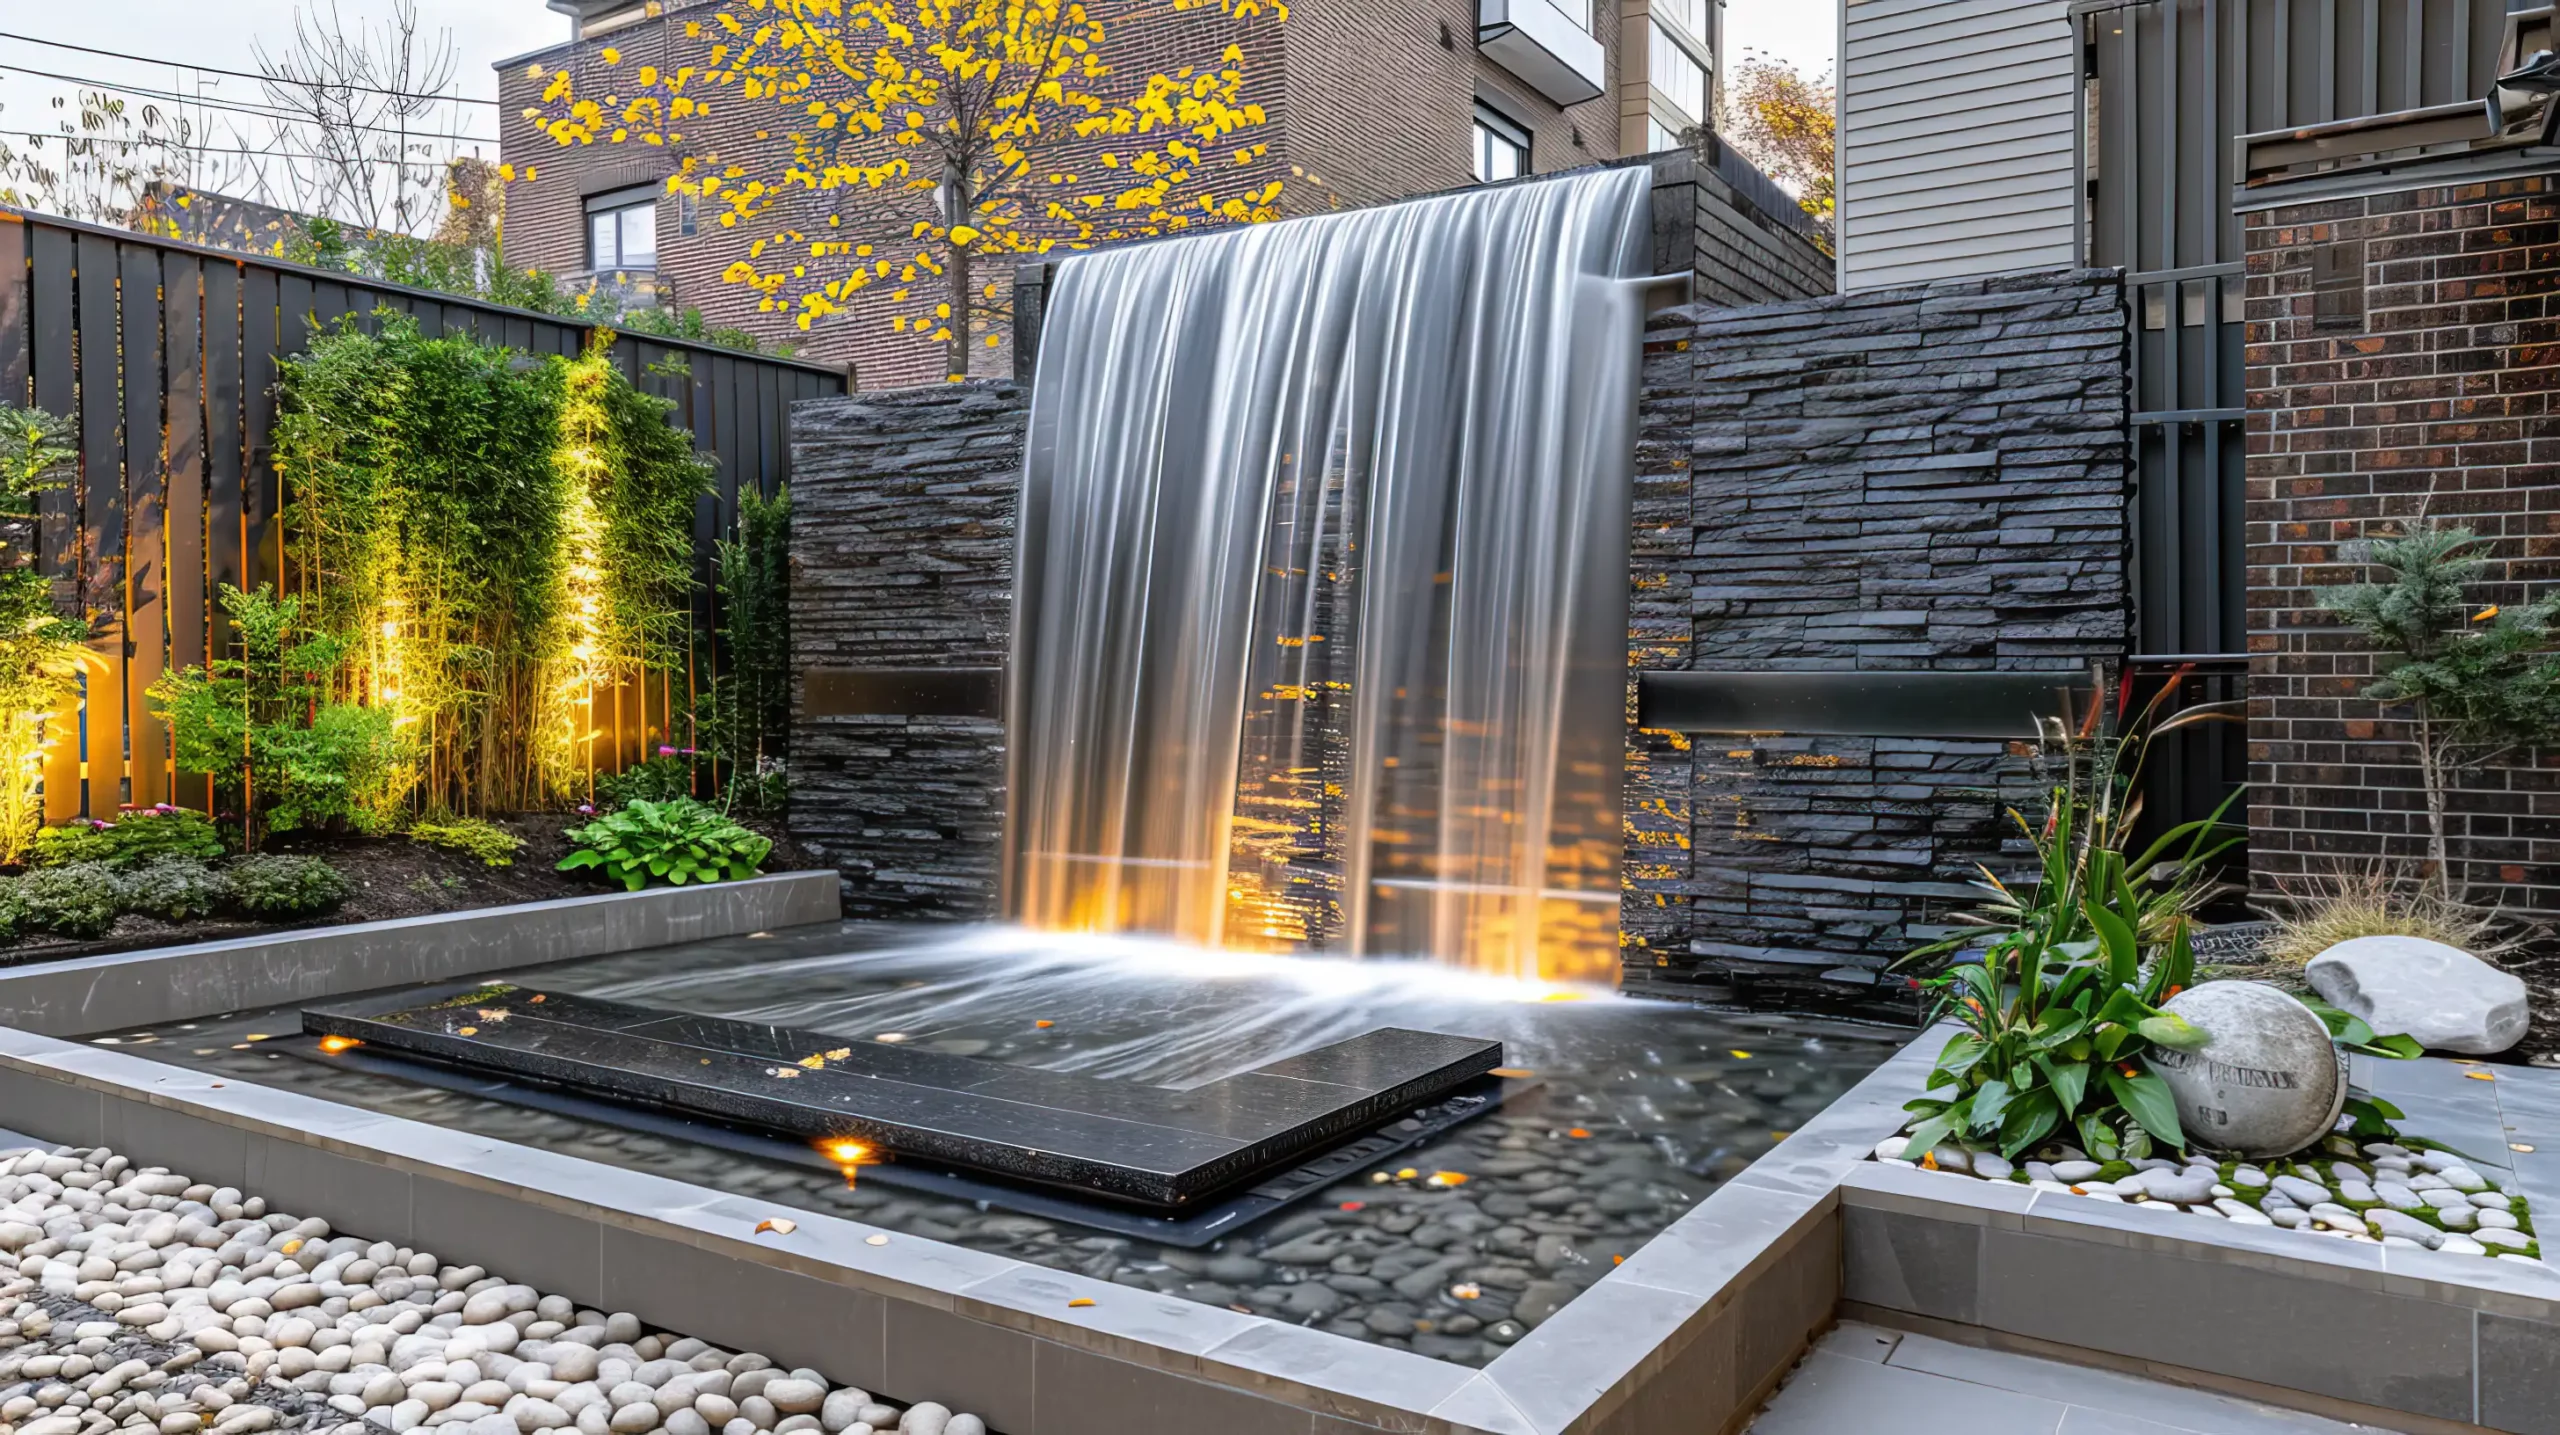
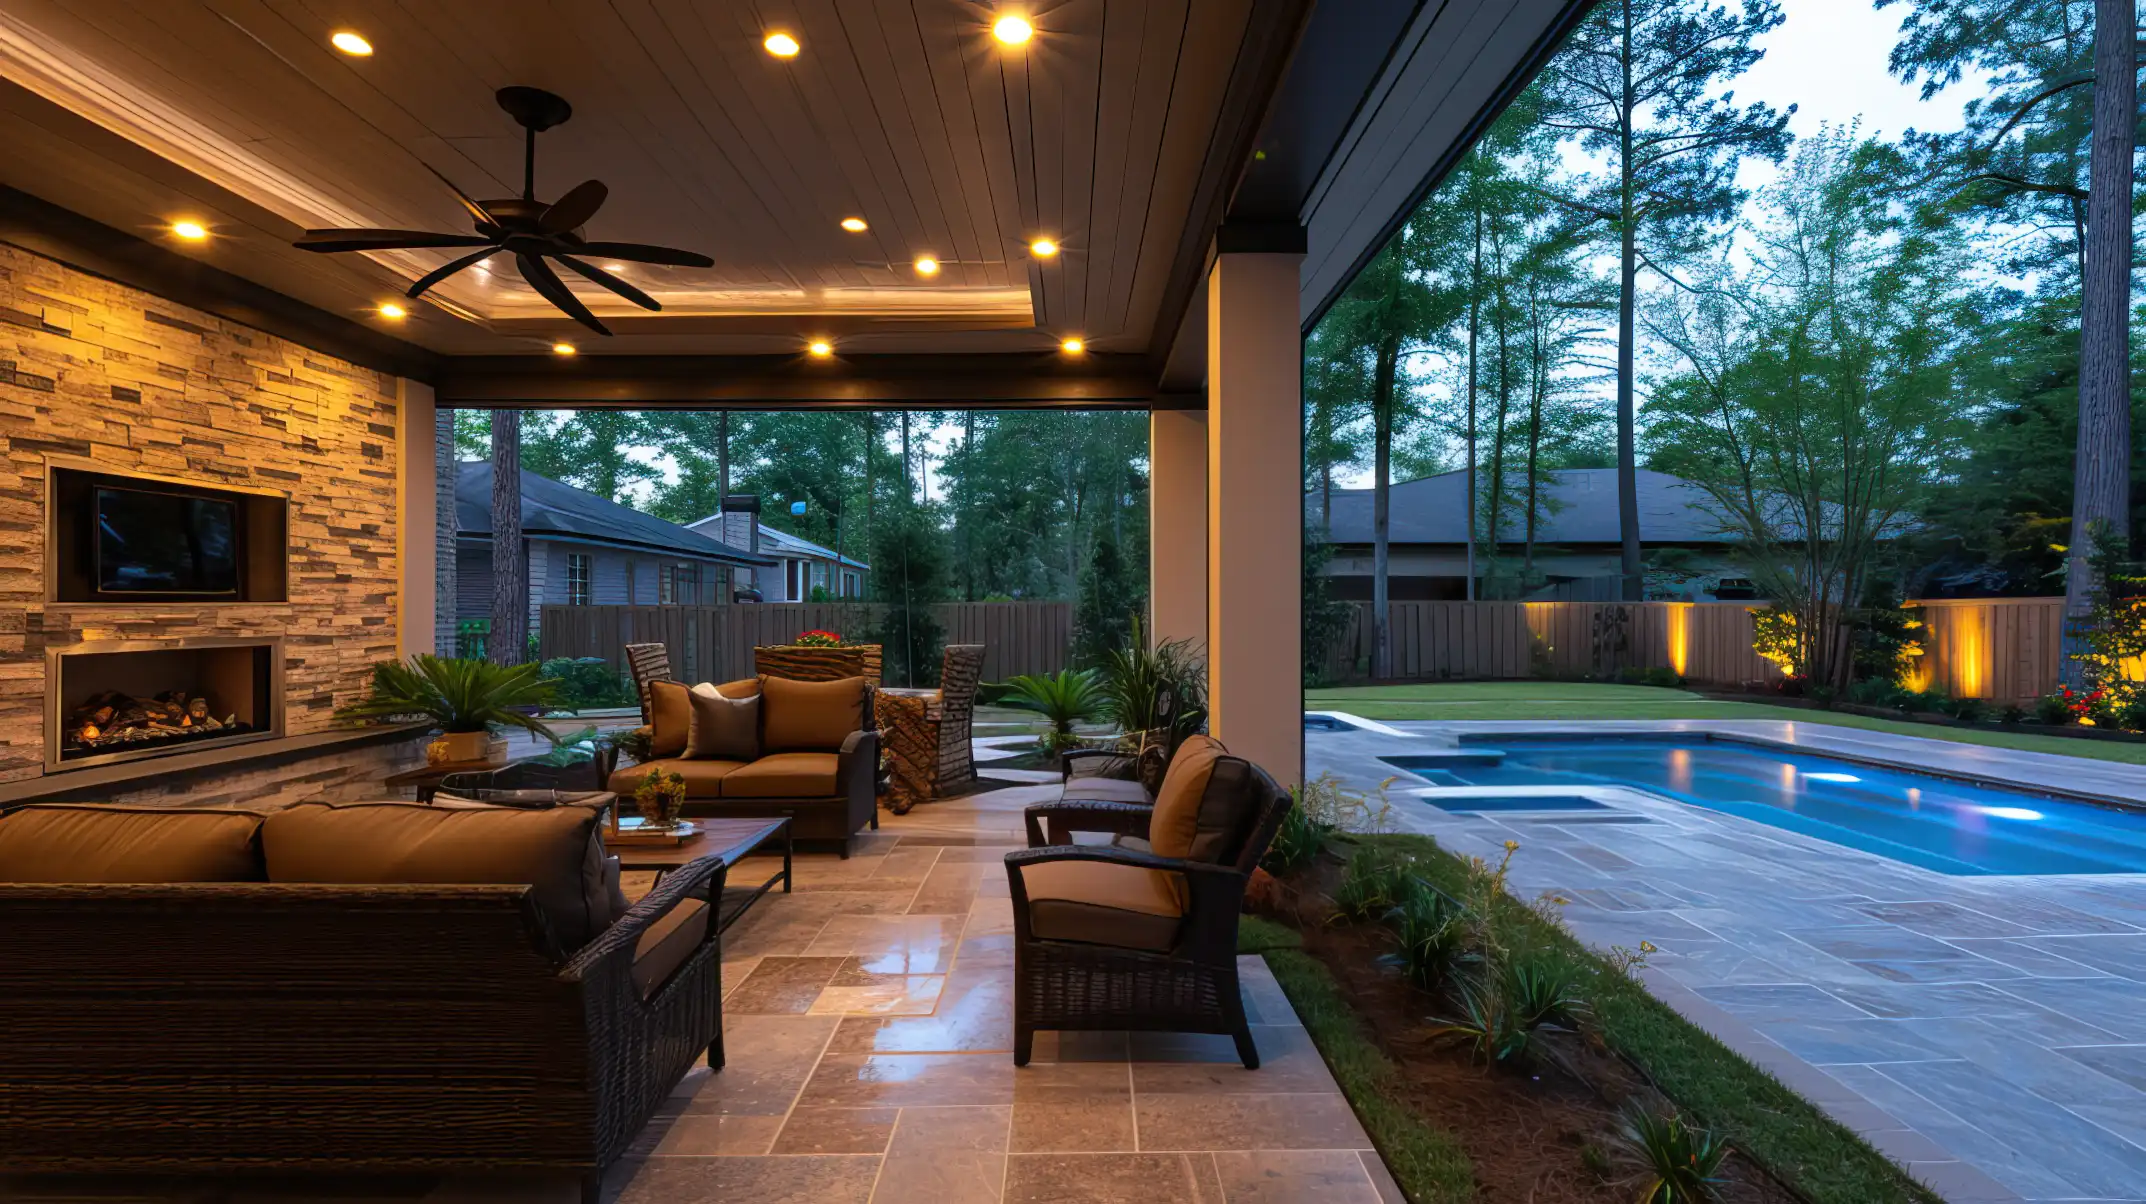
LIGHT IT UP
Light it up with solar, especially large decks and porches. It will cut down on utility costs. Gas hookups are always an option, but think of the environment prior to this option, and your pocket book. Invest in more greenery! Light projection is exquisite. Aiming upward on taller trees has always set a great mood at night while sitting under the stars. Ethanol fireplaces are the way of the future. They are Eco friendly and give the final feel to ambience for you to your green decks and porches. The materials vary in stone, very modern stainless or partial glass openings. For fillers inside your ethanol fireplace there are options like showy crystalline accents available in many colours. Lava rock is traditionally used as filler for these fire features. They look like the real deal and adhere to the heat. Using regular rocks may cause them to explode. So don’t take short cuts or get too creative with the fillers, use what the manufacturers tell you to use.
Remember to take an after photo. So if it ever comes time to sell your home. It could be used as a tool to show what you’ve invested. Greening doesn’t happen overnight this could be a project that takes years. Just like your home projects! I hope you’ve enjoyed the fundamentals of greening your decks and porches.
Materials list:
- 1X measuring tape
- 1X floor plan
- 10-12X travel, gardening, home, magazines
- 1X camera – before and after photo
- 1X ruler
- 1X (24 x 36) construction paper
- 1X scissors
- 1X spade
- 7X Vessels- minimum 1 pencil
Visit our website to find a location closest to you, or to contact a deck designer today!
Follow us on Facebook and Instagram for more deck design ideas.